Transformations are a way to reformat the data in your CSV before generating it. If generating a CSV export specifically for an SIS file ingestion, transformations are an important step to ensure the data appears in the format required by your SIS.
This step is optional -- if you do not require transformations, simply click on Save and Continue to move onto the next step.
SchoolMint provides a set of default transformations that can be applied to both the entire column or individual fields within a column (should you have more than one field within a column).
Default Transformation Options
- Proper Case (ie: john doe would be transformed to John Doe)
- Upper Case (ie: JOHN DOE)
- Date Formats:
- MM/DD/YY (ie: 12/15/80)
- MM/DD/YYYY (ie: 12/15/1980)
- YYYY/MM/DD (ie: 1980/12/15)
- Phone Formats:
- XXX-XXX-XXXX (ie: 555-666-7890)
- XXXXXXXXXX (ie: 5556667890)
- (XXX) XXX-XXXX (ie: (555) 666-7890)
- Yes/No Formats:
- Y/N
- 1/0
- Trim (removes leading/trailing white space)
- Squish (removes all white space)
- Male/Female Format (ie: M for Male, F for Female)
- Transliterate (ie: José sent as Jose)
Apply Transformations
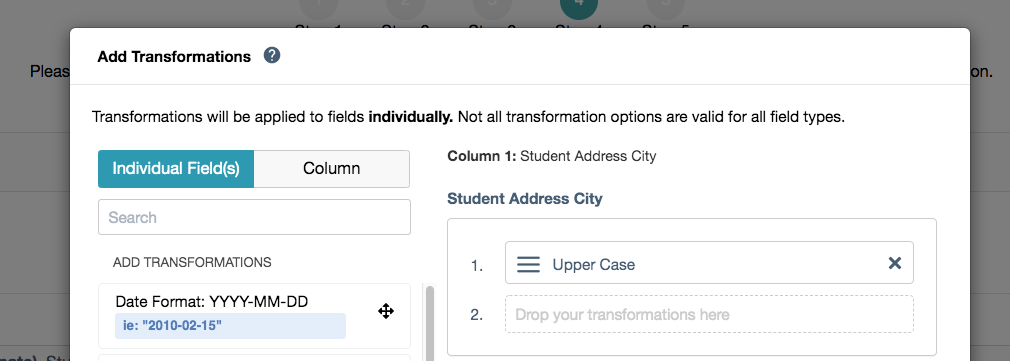
To apply transformations, locate the column you wish to edit and click on the Add Transformations button; a modal will appear.
Individual vs Column Application
Note: If your column contains only one field, this functionality can be ignored. Simply apply transformations to the field via the Individual Field(s) tab.
Transformations can be applied to an individual field within a column or to the entire column itself. Simply toggle between Individual Field(s) and Column tab and apply transformations accordingly. If required, unique transformations can be applied to each field individually. If a transformation needs to be applied to the entire contents within a column, select the Column tab and apply one of the available transformations.

Note: Not all transformations are available to apply at the Column level; only text format transformations are available (ie: Proper Case). In these instances, please return to the Individual Field(s) tab to apply the transformation to each field within the column.
Add Transformations
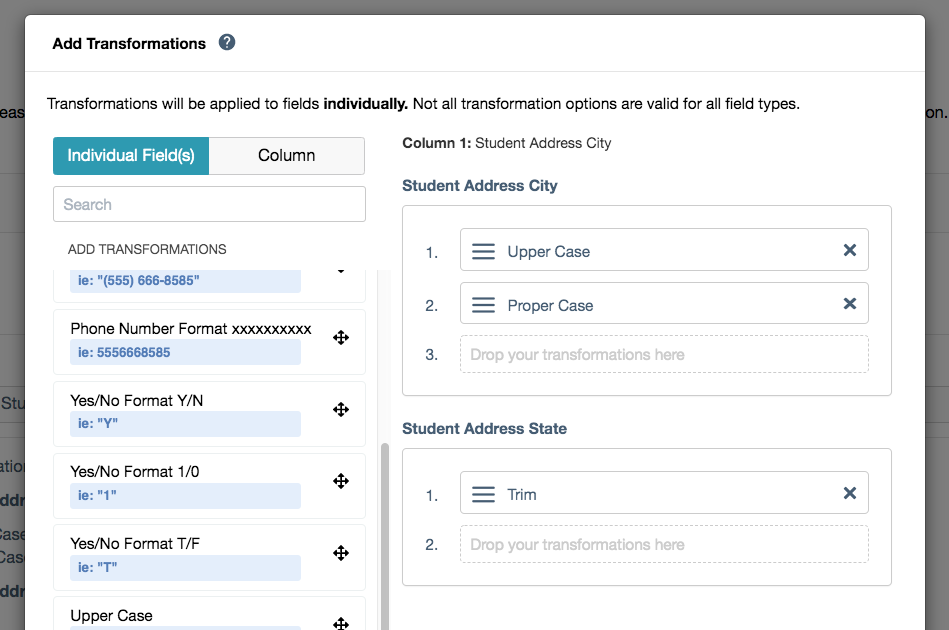
Drag and drop one of the available transformations from the left-side panel to the field(s) on the right. Click on the "x" icon to remove the transformations. If applying multiple transformations to unique field or column, use the hamburger icon (three horizontal lines) to re-arrange the order in which the transformations will be applied.
Order of Operations
When applying transformations, the tool takes into account the order of operations. If multiple transformations are applied to an individual field or column, they will be honored in the order listed. This could result in some transformations cancelling each other out (ie: applying Upper Case, then applying Proper Case gives a final result of Proper Case applied to the field or column).

Apply
After applying the necessary transformations, click on the Apply button. The transformations will not be saved to the report until clicking on the Save Progress or Save and Continue buttons.
Remove Transformations
To remove transformations, click on the Edit Transformations button; a modal will appear. Click on the "x" icon on the associated transformation to remove from the field/column. Click Apply.
The transformations will not be removed from the report until clicking on the Save Progress or Save and Continue buttons.
View Applied Transformations
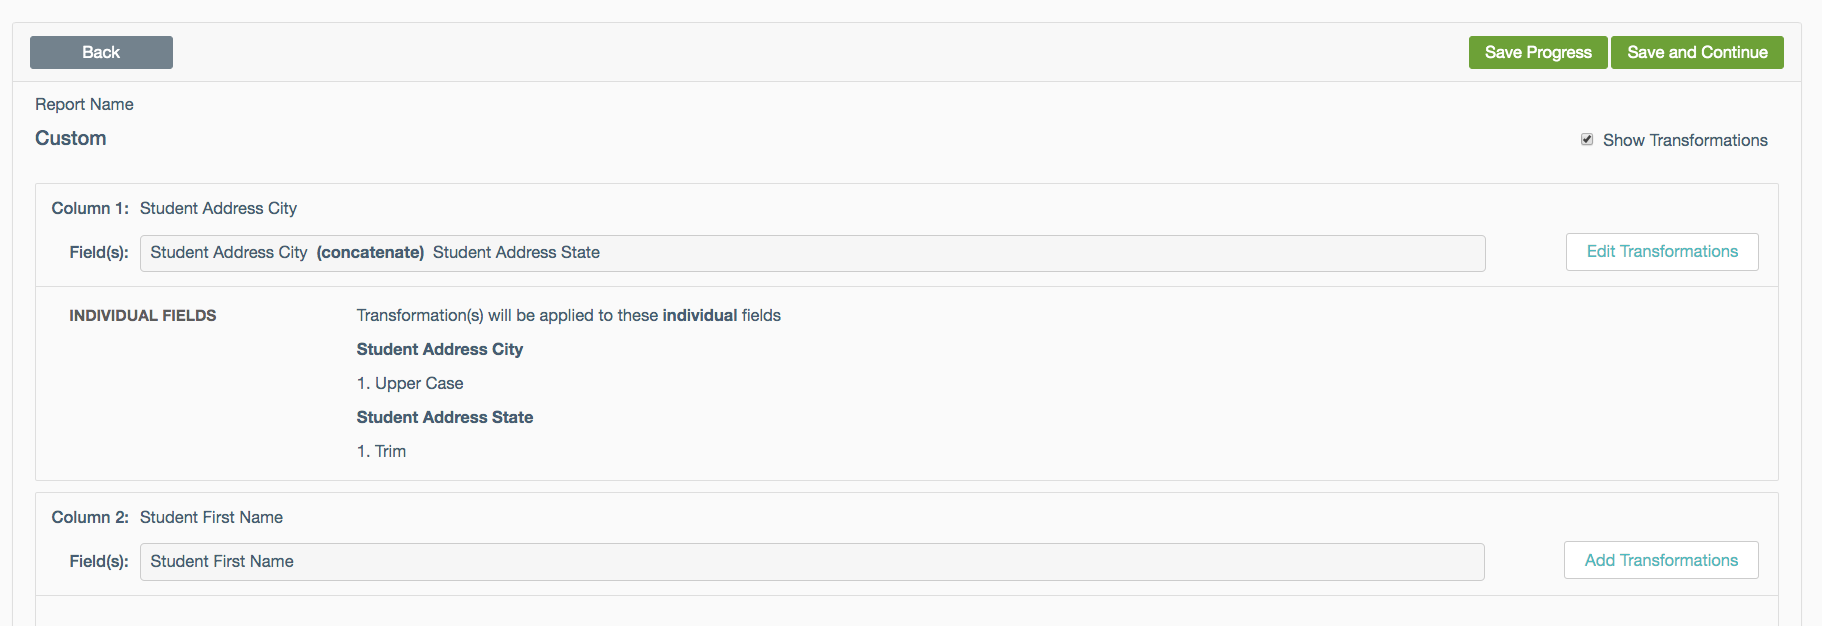
To view applied transformations, click on the Show Transformations checkbox. Applied transformations will be listed under the designated field(s) or column(s) with the designated order of operations.

------------------------------------------------------------------------------------------------------
Still have questions? Email us at support@schoolmint.com.

Comments
0 comments
Article is closed for comments.