Hero allows users to create “events”. Students are able to scan in/out of an event if they are a student listed on the event list. Creating an event is simple. To get started, being by logging in to the setup portal:
Next, click on the “Events” icon:
![]()
You can create a new event by clicking on the ADD EVENT icon located at the top right corner of your screen:
![]()
Best Practice Hint: If you intend to add students to your event, first create the event and click “save” before adding students.
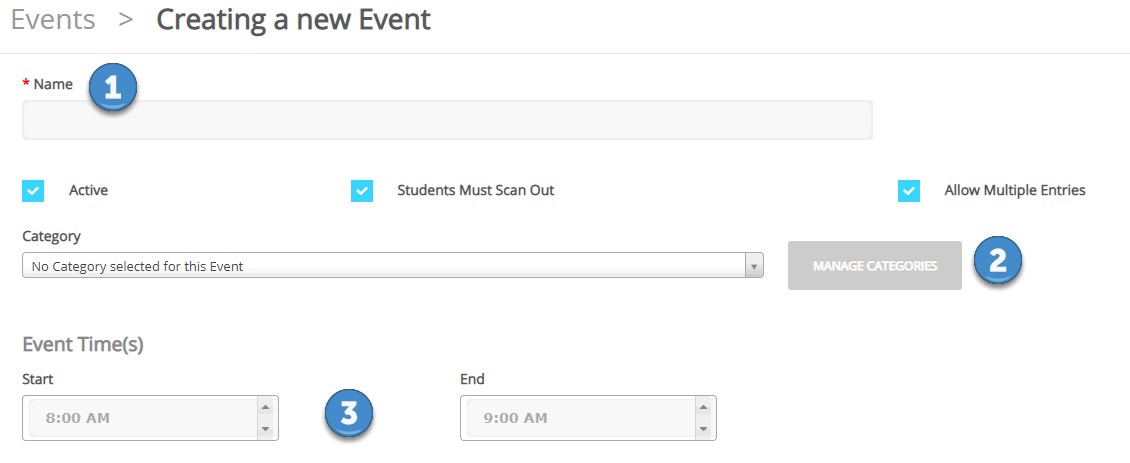
Steps 1-2 (NAME & CATEGORY)
Name the event and select a category. If you do not yet see “category” options in the drop down, you can click on MANAGE CATAGORIES to add a category.
Best Practice Hint: Categories are very important when it comes to reviewing reports. Especially if you plan to create many events in your account.
Step #3 EVENT TIME(S)
Set the running times for the event
Best Practice Hint: Set the start time at least one hour before the actual event starts, or you will not be able to start the event early and scan students in.

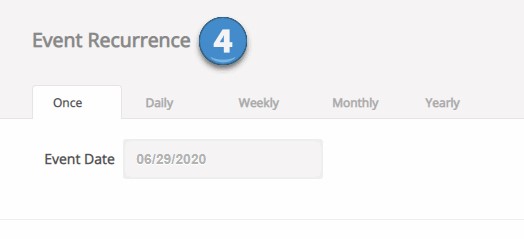
Step #4 EVENT RECURRENCE
Configure the settings for when and how often the event will run:

Step #5 EVENT CAPACITY
Descriptions:
Unlimited Capacity (Default) = No need to add students to an event, all students can attend
Cannot Add Students = Only students added to the event list can attend the event
Limited Capacity = No admittance to an event once the configured limit has been reached
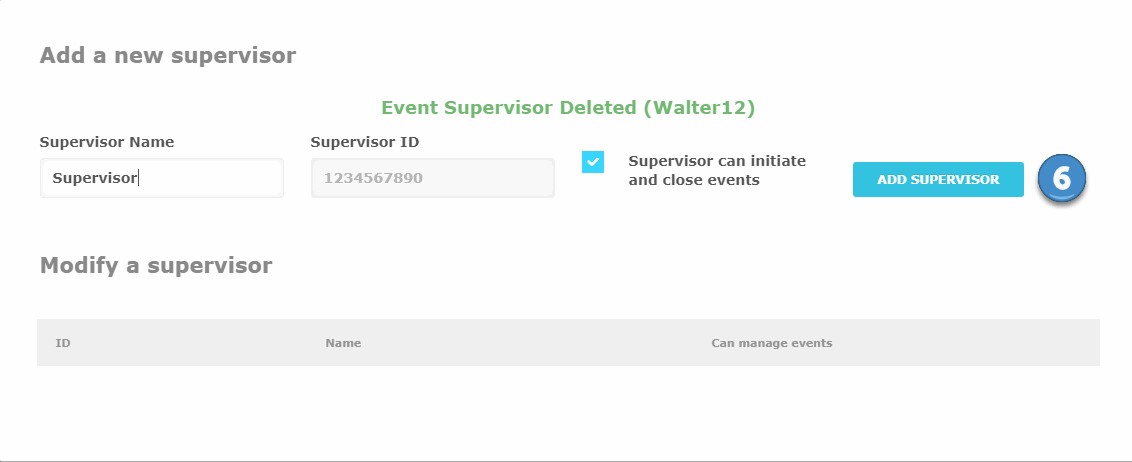
Step #6 SUPERVISOR
Select an EXISTING Supervisor or click MANAGE SUPERVISORS to create one.
Best Practice Notes: There is no need to create multiple Supervisor IDs. The Supervisor ID is used to open and closed events so that students can scan in. A best practice is to set the Supervisor ID to a number that many users will remember easily, such as the school phone number.

You have now successfully created an event! To modify an event in the future, you can return to this page at any time.
For more assistance:
Start a Live Chat now.

Comments
0 comments
Please sign in to leave a comment.