What is covered in this article?
Please note this feature is only available to schools using a direct integration with the following SIS vendors: Aeries, Chalkable, PowerSchool, Software Answers.
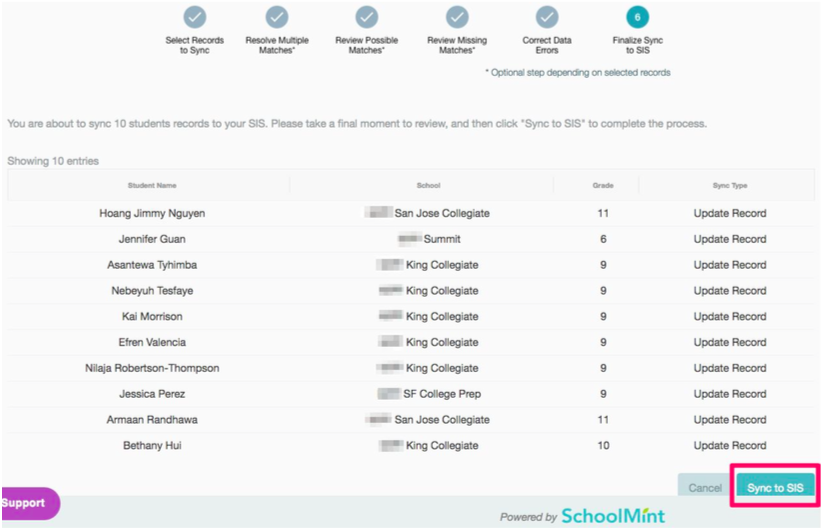
Step 6: Finalize Sync to SIS
Table features:
- Student Name
- School Assignment
- Grade
- Sync Type (Create or Update Record)
Click Sync to SIS and view Final Sync Confirmation pop-up message.
Click green Confirm Sync button to sync students SIS. WARNING: This action cannot be undone.
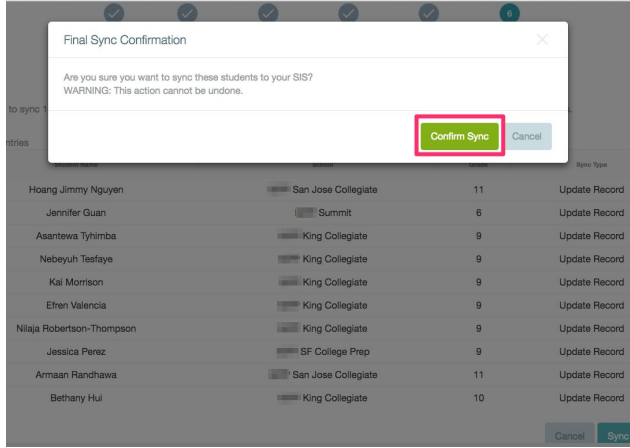
The flow moves to calling your SIS’s API to sync students, writing to new SIS fields, or updating fields in SIS.
 Admissions > Sync Log
After your sync your students to the SIS, the next page is the Sync Log. This page displays:
- who performed the sync
- when the sync happened
- how many students were selected
- how many students were successfully synced
- how many students filed the sync process
- How many students were skipped

The Table below displays the details for each student. You can Export all details or Export as CSV/XLS.
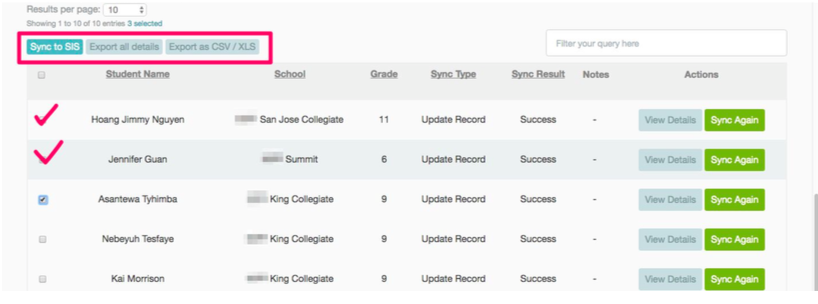
Table features:
- Student Name
- School Assignment
- Grade
- Sync Type (Create or Update Record)
- Sync Result (Success or Skipped)
- Notes - any failure would be highlighted here
- Actions
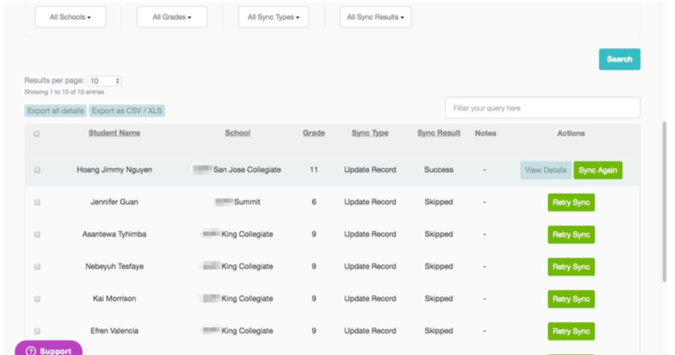
For the students that were successfully synced, you can View Details of that record.
For students who were skipped, click Retry Sync to sync the record from this page.
To view this log after the sync, go to Admissions-Sync Log.
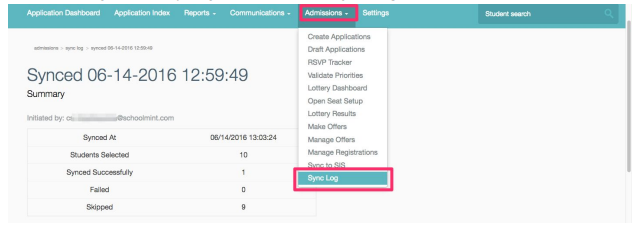
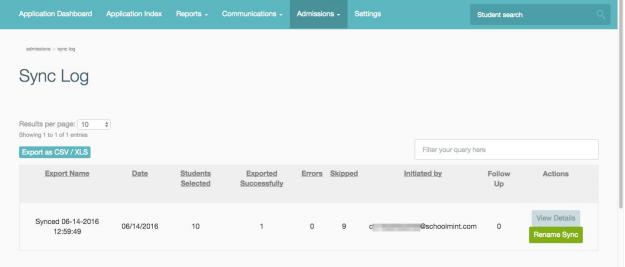
Table features:
- Export Name
- Date
- Students Selected
- Exported Successfully
- Errors
- Warnings
- Initiated By
- Follow Up
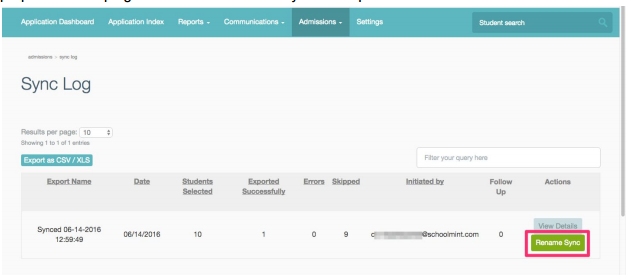
- Actions - View Details or Rename Sync
[Optional] With the Rename Sync button, you can give each Sync a new name, for internal purposes of keeping track of what/who was synced at specific times.
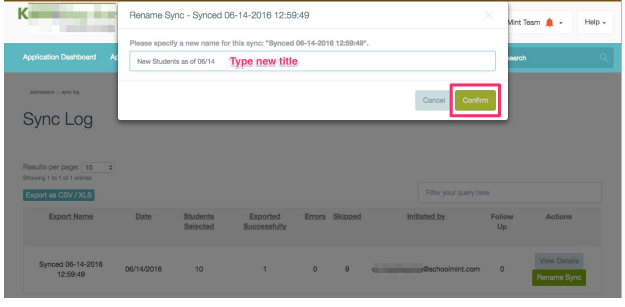
Type in new title and click Continue.
--------------------------------------------------------------------------
Still have questions? Email us at support@schoolmint.com.

Comments
0 comments
Article is closed for comments.