How do I enable Teacher Recommendations?
Please reach out to your Customer Success Specialist who can provide a quote. Once it has been enabled, you can navigate to Settings > Manage Forms > Application Forms > View > scroll down to Edit > Click on Next until you get to step 7/8 where you will see this (image below). Essentially, you can create a custom form and then select that form from this dropdown in step 7 of creating your application.

When enabled, recommendations can be requested by applicants during the application flow. Recommenders can then fill out the specific recommendation for the applicant. That recommendation will be saved as part of the application!
Step 1: Student Submits Application
Students will identify their recommender via the application. Applications can accommodate up to three recommenders:
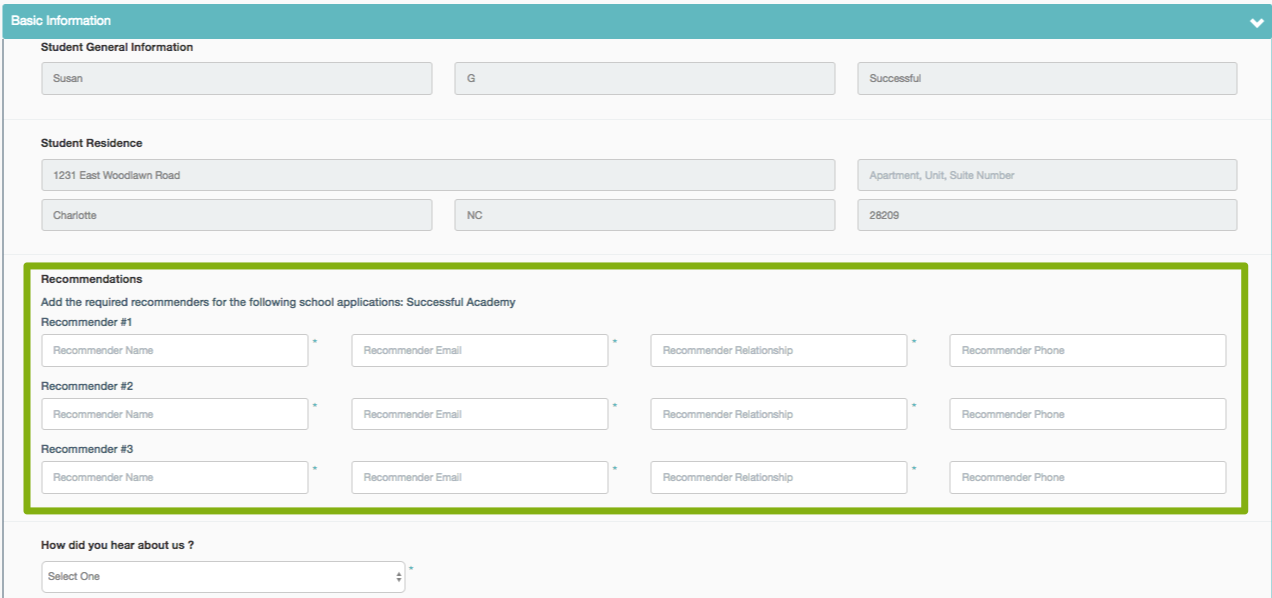
Step 2: Recommender Receives Notification
An automatic notification will be generated to each recommender inviting them to submit the recommendation form.
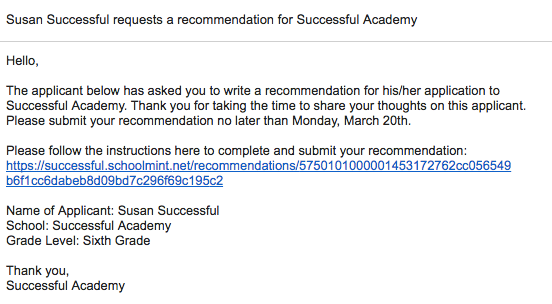
Step 3: Recommender fills out & submits recommendation
The recommender will fill out and submit the recommendation form. Recommenders are not required to sign in to submit the form. Furthermore, recommenders may not save a draft of the responses. Once submitted, they may not edit their responses.
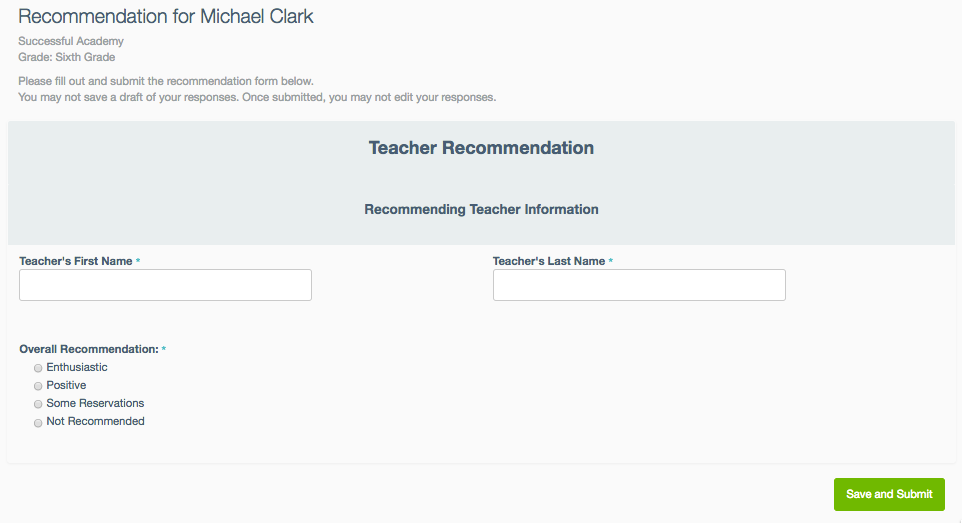
Step 4: The recommendation moves to Submitted status, and is tracked on the Student's profile
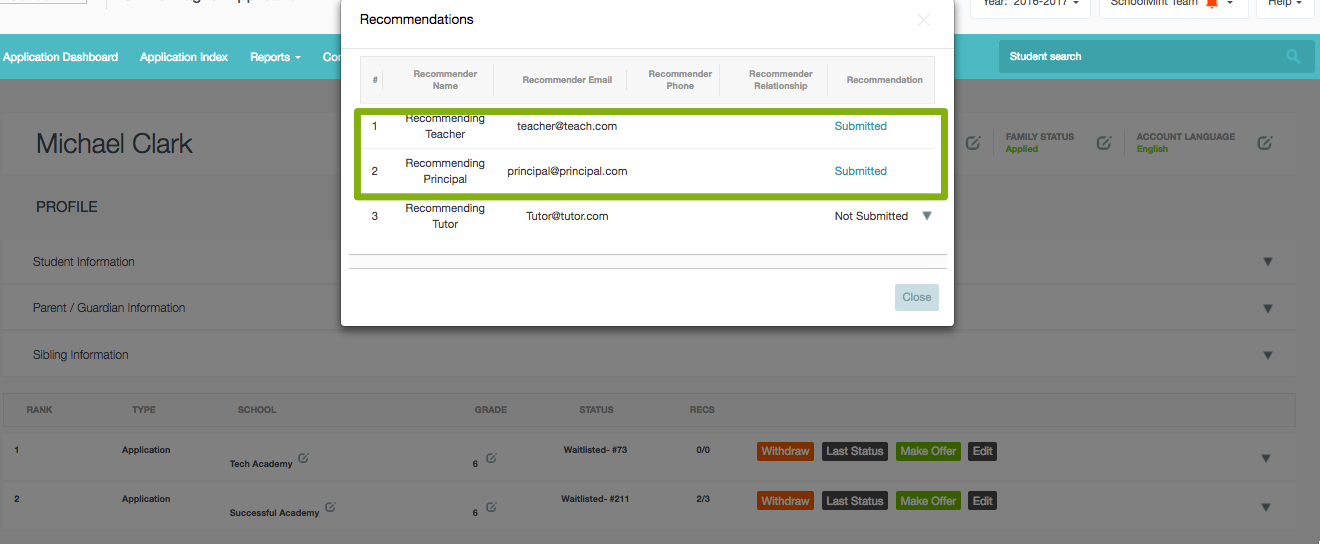
Administrators will be able to navigate to the student's profile and check the status of the recommendations.
Under Records for School Year, click the number in the Recs column to view.
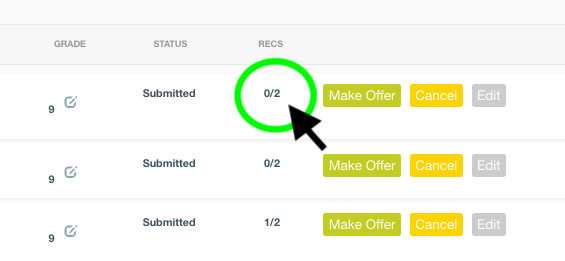
Recommendations can be in "Not Submitted" or "Submitted" status. Furthermore, admins can click the "Submitted" link to view the recommendation responses.
What are the current limitations of this feature?
- File Upload custom fields are not supported through this feature. Please make sure the custom forms attached to a recommender does not include a file upload field, as they will not be able to submit their recommendation.

Comments
0 comments
Article is closed for comments.