What is covered in this article?
- Build your Re-Enrollment Packet
- Open the Re-Enrollment Period
- Reach Out To Families
- Duplicate Accounts and Access Codes
- Other Things To Notes
Here's how you can make sure that your Re-Enrollments are ready for families! Please note: We are assuming that your Re-Enrollments have been rolled over or imported. If you still need to roll your students over, please visit this article to get started on that process.
Build your Re-Enrollment Packet:
The first step in getting Re-Enrollment open for families is setting up your Re-Enrollment packets. If you haven't built your forms yet, you can use these articles to get started.
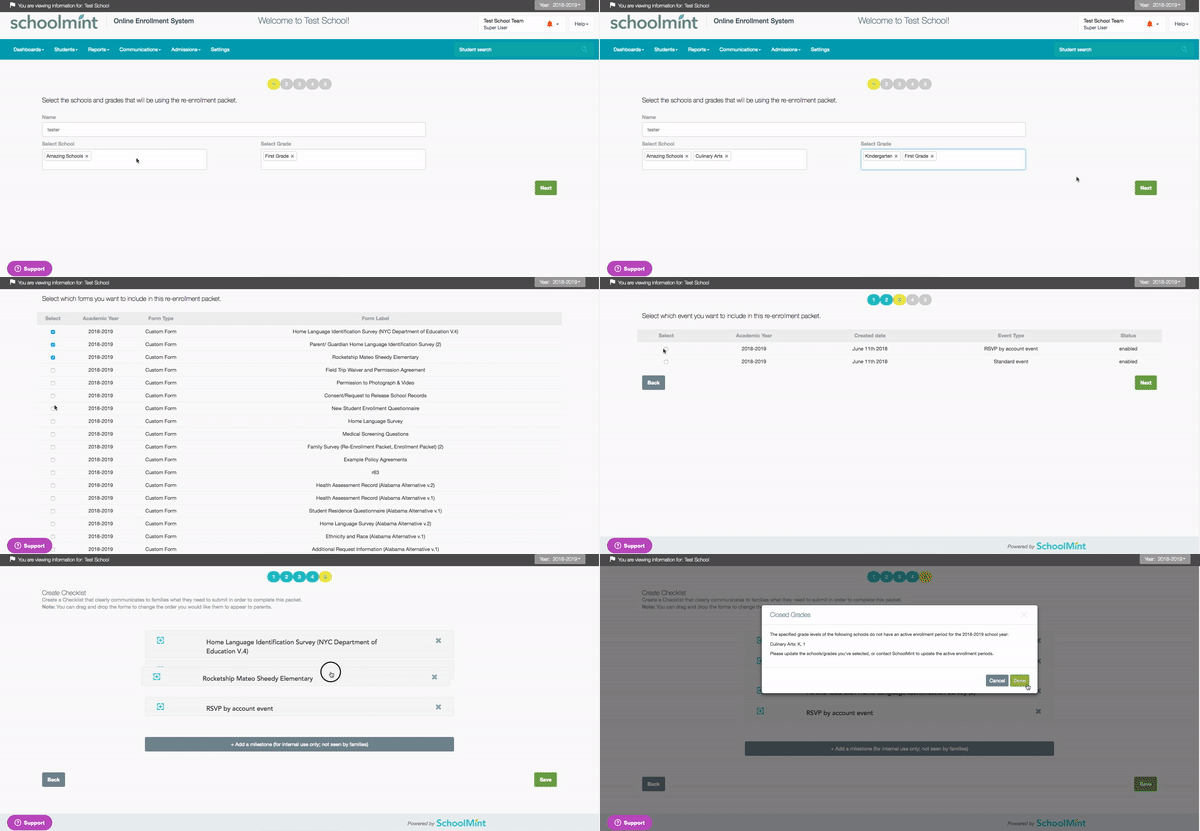
Building a Re-Enrollment packet is a simple step by step process. To build the packet you'll need to go to Settings > Manage you Re-Enrollment Packets > Build A Re-Enrollment Packet.

Next, you'll be prompted to name the packet and select which school(s) & grade(s) the students completing the packet are re-enrolling for. Next, you'll be able to select which forms, events, and payments should be included in the packet.

For a more in-depth guide on how to set up a Re-Enrollment packet, visit this guide here. Once you've built your packet it's time to set your Re-Enrollment period.
Open the Re-Enrollment Period:
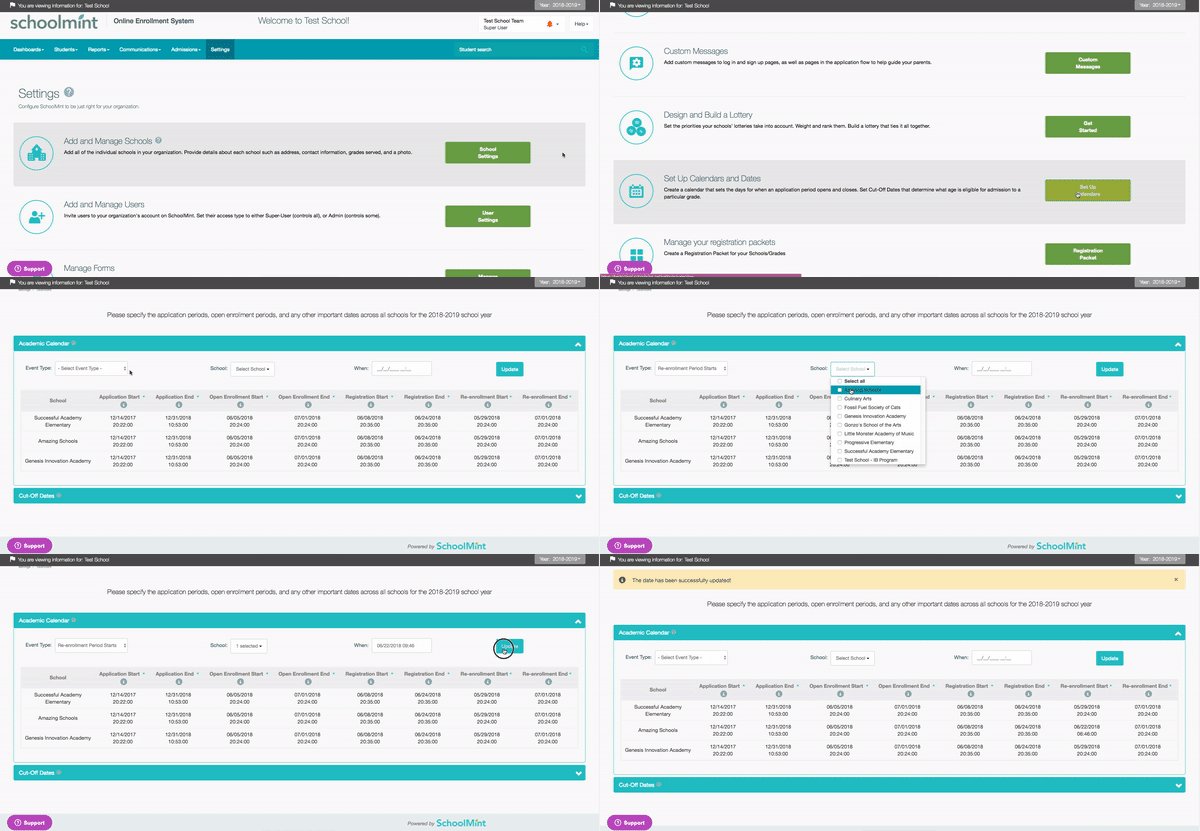
The next step to opening Re-Enrollment to families is to set your Academic Calendar dates. You can do this by going to Settings > Set Up Calendars and Dates. Next click on the Academic Calendar tab. You can use the options on top of the calendar to update the following dates
- Re-Enrollment Period Starts
- Re-Enrollment Period Ends

- Please note: Both the Start and End dates must be set in order for parents to Re-Enroll. If both dates are not set parent will get an error message.
Reach out to Families:
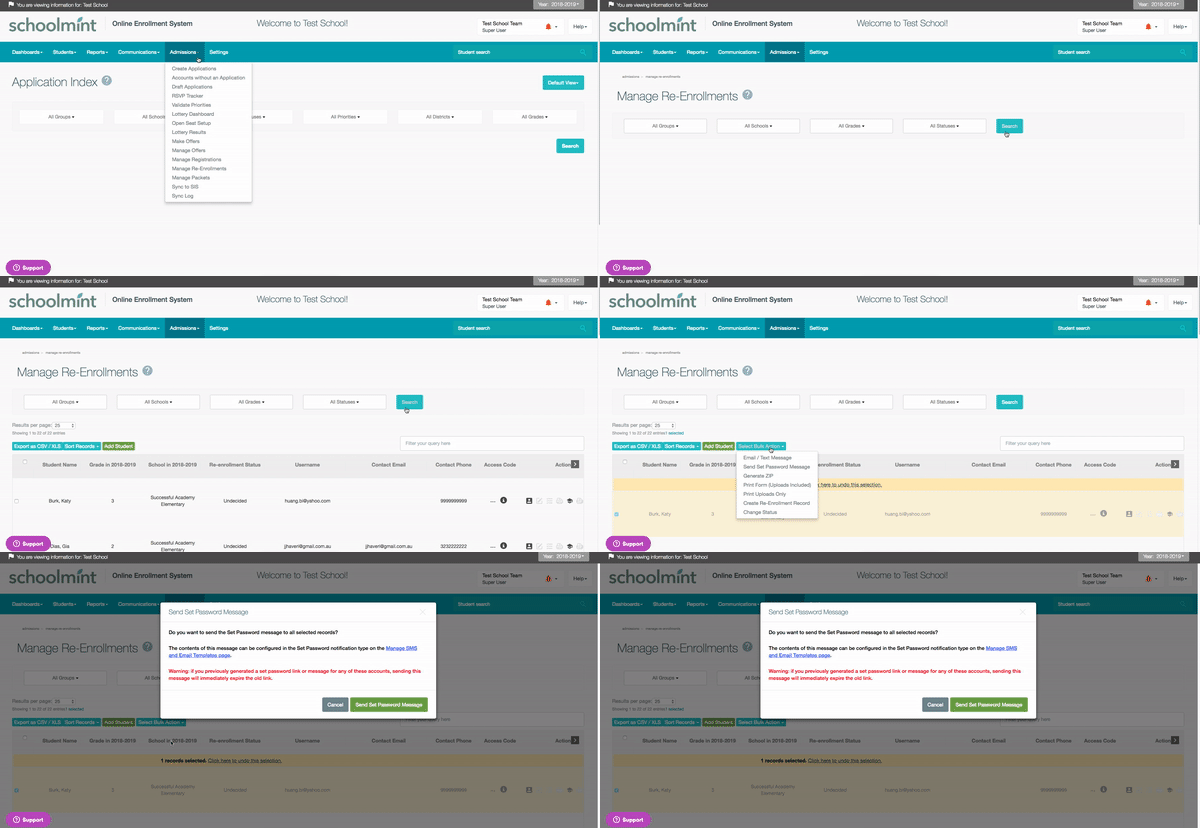
The final step is to reach out to families! You have several options, which include mailing physical letters, but we recommend that you send families the Set Password message. Since some parents may not have used their account since they completed the registration from the previous year, you may have a lot of parents who do not remember what their username or password is. This can lead to parents creating duplicate accounts and records, so sending the Set Password message is a great way to prevent this issue! Additionally, if your parent already created a SchoolMint account previously for registration, their username will not be updated with the latest information provided in the import template. This can be changed manually for students in the UI.
You can do this by going to Manage Re-Enrollments and selecting your students. Next, click Select Bulk Action > Send Set Password.

Duplicate Accounts and Access codes:
Please note this scenario only applies if you have rolled over your students or completed a Re-Enrollment Import. These records are automatically tied to an account and do not require parents to enter an access code. If you've manually added the Re-Enrollment record then parents will need the access code.
If parents create a new account even after you've sent them the set password notification, they may contact you to ask for an access code. In order to ensure these parents can complete the Re-Enrollment you can either:
- Complete an account merge. You can use this guide to learn more about merging.
- Provide them with the correct username and instructions on how to reset their password.
Other things to note:
- If your organization uses the Intent to Return feature, some students may get stuck in the Returning Status. If parents are unable to move forward in the Re-Enrollment Process, you will need to change their status to Not Started. This will allow them to move forward in the Re-Enrollment process.
Once you've completed these steps, you're all set!
-------------------------------------------------------------------------------------------------------
Still have questions? Email us at support@schoolmint.com.

Comments
0 comments
Article is closed for comments.